FC Doors
Did major changes happen to the FC-150 and FC-170 from the beginning to the end
of the FC production? Looking at photos of the Willys made in 1957, the FC-150
and FC-170 bodies and doors appear to look the same, all the way to the end,
that includes all of the later Kaiser made FCs, thru the end of the FC
production in 1965 and this also includes the 1964 M-series vehicles. So it is
easy to spot or understand that there are physical chassis differences of the
FC-150 early narrow track / and later wide track, but the chassis is the same
between the early FC-170 and later FC-170 vehicles. What is not as easy to see,
is that at the time of the change to the improved cooling tunnel on all models,
the doors were also made different. To help understand about the different cabs,
see these items in the FC Connection: Remember being similar to look at, but
changes were made.
Click here: Cab
Differences: Early Verses Late Style
Click here: Are Cab's Interchangeable?
So the cabs are different for two reasons.
1. The Body for the F-134 was different from that of the L-226. The mounting
holes on the cabs of the narrow tracks needed to be moved out to fit the new
frames of the wide track, because they were in a different location on the
frames.
2. The new improved air intake for the new improved tunnel was changed, it was a
big enough change that the whole cab and even the doors were changed to be
different.
3. But the biggest reason is that the Willys Jeep plants became Kaiser / Willys
Jeep, so a lot of things changed.
Here is the problem, because Willys and Kaiser/Willys used left overs, there are
some early doors and early cabs mixed on later 1960 and 61 FCs, registrations
are only a guide.
So why did they use the same Part numbers of the doors, early and late? Why
would they change them, after all they are still doors? The only thing that is
certain is that if you have a cab with the early cooling tunnel, then the doors
on it are different from the doors on the cabs that have the later cooling
tunnel, so don't use the early doors on a later vehicle, or vice versa, don't
use the doors from a cab with the later cooling tunnel, on an early cab. It
sounds like a person couldn't make a mistake, how can a person not know what the
doors they have based on that. The Narrow tracks and the early wide tracks had
the early cooling tunnel, so even on the early FC-170, there was the different
cooling tunnels.
It is a tiny difference that can hardly be measured, because it is at the bottom
of the door, that the early doors are shorter by 1/8" at the front and as much
as 1/4" as it moves back, also different is the curvature, the door will fit on
5 different corners but the bottom edge nearest the floor sticks out as much as
1/4", it can seem invisible until it is painted, but then another problem
happens, below the lower windshield corners, at that location on the body and
the door, it has a radius on the upper side, the radius is different between
early and late. It seems impossible, why could the engineers not know? Better
question is how can I ever avoid or miss, well remember that the later cooling
tunnel matches the later doors, this is a good assumption, but not a for sure
definition.
My M-679 had some needs, they were needs that required at least set of doors and
a front clip, and a lot more or less. So I used a 63 FC-170 as a donor, for the
front clip and the doors, the doors were green and the cab was green that they
were on. I had the doors off and waiting for minor body work to be done on them,
in the mean time, I used the perfect M-677 #2 doors, to set up the new roof, the
rain gutter and door post body locations. Back to the green doors that were on a
63, so they were almost perfect, Paint remover and some minor repairs and they
were painted. Nice so far, eventually the Ambulance was painted white inside and
out with the doors on, they were painted and hung well, and closed good. Whoops
I guess that on a green truck that was already almost 50 years old, somebody had
previously put on an early driver door, I had put the wrong door on it. No big
deal. it looks OK for now, I can make some metal changes to it later, because I
didn't use the Phillips head bolts on it, instead I repaired the hinges and used
grade 8 regular bolts instead, some of you have probably wondered why there are
no windows on my M-679, well now you know, I need to change the driver door.
So as a simple reminder about the doors, 57-58 narrow track are the same as 58
to early 60 wide track, also the same on the FC-170, those are all the same. And
then all later 60 and later FCs are the same but different from all trucks with
the early cooling tunnel.
So here are some pictures to better explain how much of a difference there is.


|
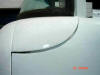
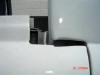
This door looks great on here, but look at this picture again and look at how it is a little too short.
This is my
advice:
If a door opens and closes easily and fits the door opening, then you have a
good door, even if it is damaged.
Do not needlessly take doors off, for a restoration of an FC that has good
doors. The argument is that you want to be able to paint the door jams easier,
not so, unless you absolutely need to, do not take the doors off, for example,
if a hinge is bad, be careful removing it, but still leave it attached to the
other hinge and if both need to come off then put the door back on. If a truck
has a crease even a bad crease or rusted out section on the bottom, if you can
fix these repairs while the door is still on the truck, then do that..So unless
you are a really good metal person avoid taking the doors off, to make it easy
for you, to work on a door while it is off. Replacing a door with a used door is
also a hard lesson, even if it is the same similar year and model, there is no
guarantee that it will hang as good as you would expect. The reason is that
during the thousands of times that the bodies and the doors were stamped out,
the equipment needed to be continuously and constantly adjusted, to make sure
that the quality assurance was within the specifications, not exactly a science
but sort of like a Friday quality compared to Monday product.
I will go over a step by step on how to fix the creased driver door.
I have heard horror stories that rather than fixing a door, someone will think
installing a different door will be easy. What some people don't know is how to
remove either the door or hinge, Phillips screws, so they may end up destroying
4 doors, the old ones and the donor doors, pounding and pounding against the
hinge screws, to get them off. What happens is they don't realize that when the
factory painted the cab and doors, they couldn't paint on the inside, so the
outer surface looks good, but the unseen inside could be rusted. So now the old
door is off and with the new painted door on, the new door won't close, as good
as the original, or it won't fit because he gap is bigger and other times the
unseen rust in the doors or door post may be bad, so pounding on the impact tool
with a bigger sledge hammer can get them even more destroyed. Imagine while
trying to take the hinge screws out, they don't budge, so a bigger sledge, or
now get the torch, get that screw red cherry red hot. Wow, at this point the old
doors are now better than the bent door posts, and it is time to go to AZ and
look for another cab.
I will now cover the how to, repairs of doors.
If your door has a crease, from the door opening to far or there is rust, it can
be fixed easily, if it is so crashed that the metal can not be repaired, then
cut it out straighten the door inner framing, make sure it opens and closes,
then add in a replacement piece of sheet metal, there are three other ways to
repair them, the best is remove the skin and replace all of it, with a hand made
skin, none are aftermarket available. Or make a portion of the skin and patch it
in, the third way is to punch a bunch of holes and ruin the door worse than it
was. If it is a flat crease, I tack weld on some 1/4" carriage bolts, in and
along the deepest part of the crease. (You can use a pin welder but then that
makes for smaller areas to lift) Then I take some channel steel and cut pieces
as wide as the crease, then I add a hole in the channel for the carriage bolt,
Unistrut works good, as I turn the nut against the channel the crease comes up,
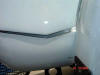
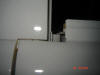
then just hit the sides of the carriage bolts with a grinder. See this picture.
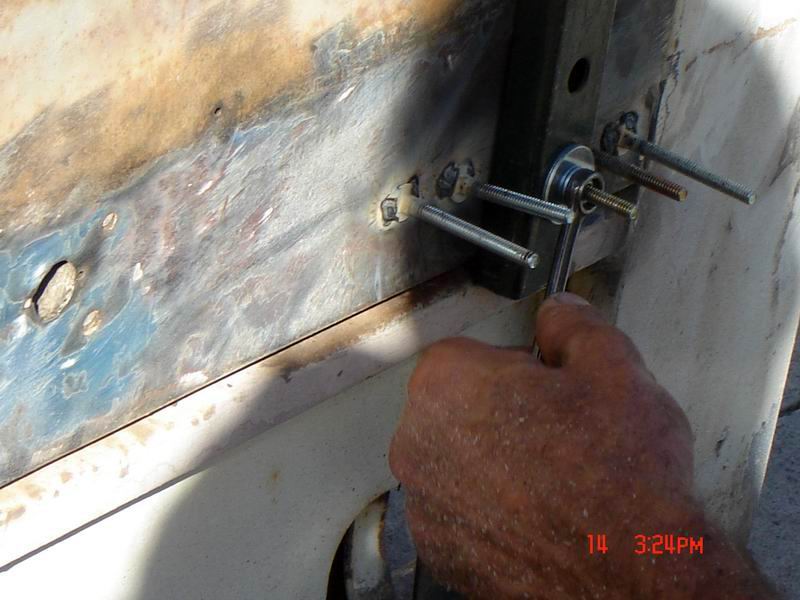
But before
that, the door stop that caused the problem needs to be fixed and needs to be
repaired.
About the Phillips head door hinge screws, I take them out, with a hand held
impact and replace them with grade 8 Allen head screws or regular head grade 8
bolts. The trick is, to not use a bigger hammer, the trick is to not beat to
hard on the door or door post. Because the removal of a door or the repair of a
hinge, does not need to be the end of a rusty truck if it is done wrong. Don't
forget he painted side always looks better than behind the doorpost or inside
the door, so before you put it all back together, use some spray bedliner inside
the door, through the rectangular access cover, and do the same behind the door
post, or use one of the WD-40 nozzles with the tube on it, on a Rustoleum spray
paint can.
If the Phillips screws don't come off, then drill a tiny 1/16" hole in the
center of the resistant screws, non American made drill bits should not be used.
When you start drilling the heat from the drilling will require oil penetration,
I keep drilling and squirting, the heat from the drilling helps to penetrate the
oil, after the drill makes a hole, then I squirt some more into the hole, this
will now get the oil on the backside of the screw, after it sits overnight the
screw usually backs out with a few taps on a hand held impact, if it doesn't go
to the next size bigger drill bit and do it again, spray it and wait over night.
I use a sears brand hand impact, and a small sledge hammer, here is what you
need to know, I use motorcycle chain, spray lube oil, a thicker oil than WD 40,
and I buy my bits from the Snap on truck, they cost about $12 each for the bits.
Plan B, if after drilling and waiting over night the don't come out then heat
lightly with a torch, and (with the torch off) keep adding more spray oil, they
will come out.
Plan C, Cut out an opening on the inside, pound out the outside from the
backside, replace the hinge mount, then weld the inner door, because the door
panel will hide the welded panel.
plan D. This is what needs to be done when the previous owner used an inferior
bit from an inferior non American made tool supplier, the screw is so bad that
it is not going to come out because the Phillips head grooves of the screw are
now very damaged, or the paint is so nice that I don't want to add the torch and
damage the paint. Continue as in Plan A and B, after the hole is drilled, drill
up and step up until you have a 1/4" hole, now the head should be ready to break
off. After doing this and the door is separated from the hinge, then all the
broken or damaged screws that are still in the hinge can be retapped to 5/16
fine thread again.
The trick is to have a good American made, Snap-On or older Craftsman, hand held
impact tool, have a few, of the more expensive Phillips head impact tool tips, I
also buy the very best American made drill bits from a machine shop supplier and
I use the motorcycle chain lube. When I am done I can know that the door and
door posts are still good enough and that the hinge is still rebuilt.
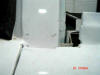
There is only one more thing that's left, for me to show you about how to
identify early and late doors, look at the top of these doors, by where the
window frame slips in.:


|
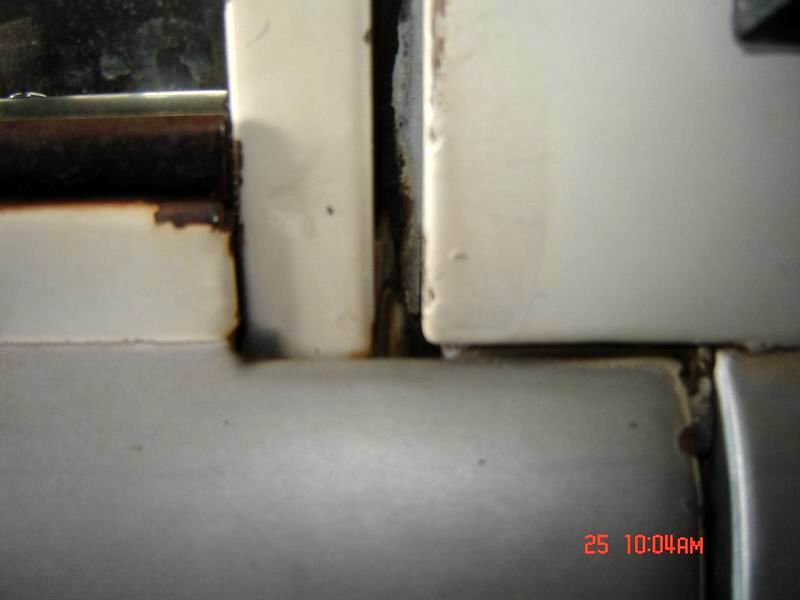
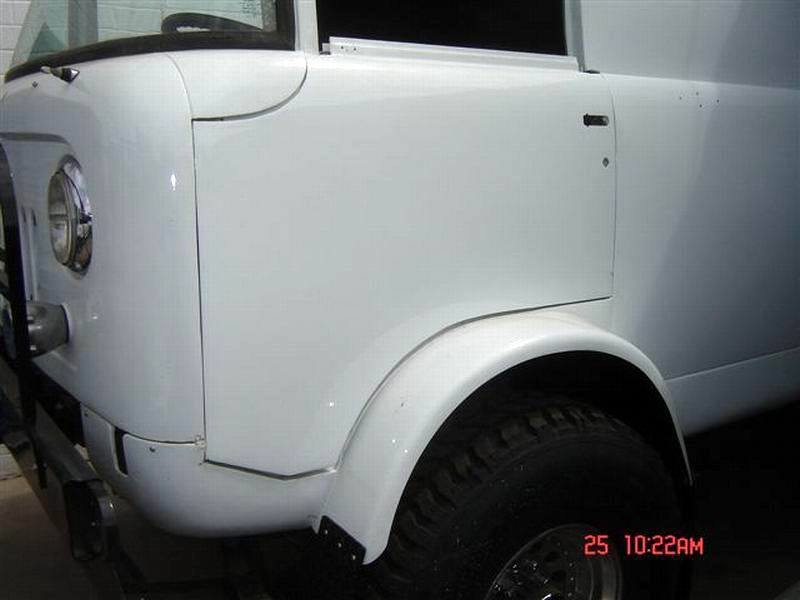
This is a later model door, notice real close, at the top of the door where the window frame slips into the door and then look at the straight line that goes against the rubber bumper on the cab.
I hope this explains the door differences.
Jesse Ybarra