One of the most common questions people have when they start restoring their FC
Jeep is, "What sheet metal is available." Unfortunately with the small
production numbers companies have been hesitant to reproduce any repair panels
for the Forward Control Jeeps. This question regarding sheet metal repairs
on doors was posted on the Forward Forum and Jesse Ybarra shared his experience
on this process with us.
Posted by
Joe B. 12/13/2009, 18:42:13
"Reskinning a Door
"
My driver's side door has deep surface rust, the common fold along the front edge from the door limiter failure, and a good bit of rust-through in the lower regions. The inner door frame is in reasonably good condition, however. I'd like to replace the skin from a point just below the door handle. The door skin is -- of course -- slightly curved in this area in the vertical axis, but looks pretty flat along the horizontal axis. Have any of you folks successfully skinned one of these doors with a flat piece of sheet metal with just a slight single cylindrical curve to it, or does this repair require a compound-curved sheet?
Posted
by Jesse Ybarra on 12/14/2009, 0:32:49,
In reply to "Reskinning
a Door"
This
is not something for everybody, if you have never done work like this, and the
following sounds to easy, I suggest that it is not. For anybody that has no
experience with this type work, I suggest don't waste the material or the door,
better yet don't try it.
First before anything, get the body door jam / frame measured and adjusted if
needed, measure the other side and make sure the two openings are exact, and be
sure the hinge mounting areas are exact, use a tape and level and make sure the
body is correct. Now the door inside portion, remove all of the outer sheet
metal and prepare it completely inside and out, use a grinder and make it clean
for welding all around inside and out. Now compare your hinges, to the other
side door bend and adjust if needed. Install new hinge pins. Bolt on your
hinges, hang that portion of the inner door, and see that it has good fit with
perfect alignment. Now take it back off, and set up an area to have a flat metal
table to be able to securely clamp or bolt down the inner door. This area has to
be safe from fire and have enough room to walk around the door, to grind and
weld.
I have used 20 gauge, I prefer to do the whole skin, because I can do it all
with the new metal, sometimes the old and new metal will oil can and warp later.
I over cut 3/4" all around, I make the first upper bend, on a home made brake,
starting below the window, then, I use an angle iron to clamp it horizontally
all the way across that fold to a mounted 8" pipe, (I think Craig has a picture
of the primitive pipe mounted to a truck tool), I clamp the sheet metal
sandwiched under the heavy angle iron, along that folded edge on to the pipe,
then bend the upper roll on the pipe, then, I mark and fold the bottom
horizontal edge and the lower front edge, to a little more than 90 degrees, then
I secure the inner door side down to the table, then C-clamp, hand tight, the
bottom and front corner, then, I take a small hammer and start bending the lower
rear curved edge, after the curve is made and bent, then I flip it all over,
then I start from the bottom and begin folding and lightly weld tacking on the
skin, I do not make any final welds, as I work my way up, I start doing some
clearance cuts to be able to continue to fold on the rolled edge, I alternate,
front and back, then continue to lightly tack weld, I continue the heat and
hammer fit the folded edges, once all edges are all folded bent and tack welded,
then I hang the door, and expect it to not fit exactly, because it was only tack
welded, it will not be difficult to adjust and bend to fit into the opening, if
you have an area that will not fit, to wide or not wide enough and is wrong,
then grind off the tack weld and correct the problem area. Now clamp the door
outside down, start now to tack weld more from the top then (alternate side to
side), on down and continue to re-hang and check the door, then hammer bend,
then weld, do a little bit of final weld, alternate a little at a time and
re-hang the door, do not weld while the door is hanging or it can oil can and
warp. Don't forget the reinforcement inner braces, then after you are all done
cut in the door handle and lock hole openings.
At this point, remember how I lightly used the grinder with an intent to clean
all the inside surfaces, it is because now, I spray sound deadener or POR-15, to
the inside of the door through the access opening on the inside of the door.
Like I said earlier, about this procedure, this is not for everyone and it is
especially not for me, to do any doors except mine.
Posted
by Joe B. 12/14/2009, 18:31:50
Re: "Reskinning a Door"
Excellent! Thank You very
much for taking the time to provide this tremendous description, Jessie! Yeah,
I suspected all along that this wouldn't be for the faint of heart. My metal
fab skills rate a solid B-, and I don't expect show-quality results, so I may
just give it a go.
Much appreciated!
Joe B.
Posted
by Jesse Ybarra on 12/14/2009, 20:46:21
In reply to "Re: Reskinning
a Door"
Joe,
If the bad door has good metal for over 50% cut out the rust, if you have some
other older used metal, for example another door any brand, that you can cut out
the pieces to replace the rusted areas, it will easier to use older pieces of
metal, than making a new door skin out of new metal. On the door crease
consider using a hole saw on the inside and pound out the damage, then re-weld
back the hole plugs that were cut.
Here are a few pictures of primitive sheet metal forming tools that Jesse made to make panels on his M-679 project. Here's a link to follow his M-679 rebuild.
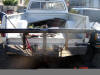
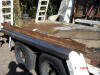
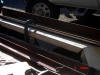
|
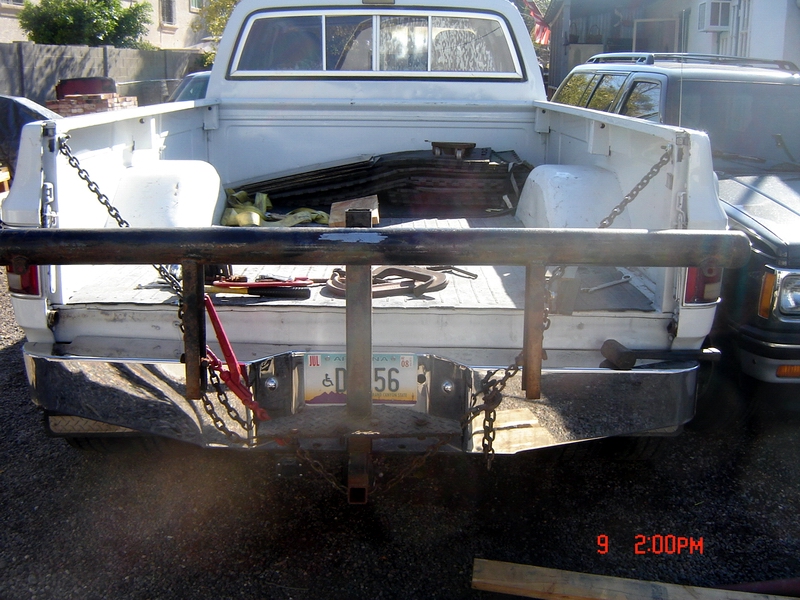
This simple tool was made and mounted to the bumper of a truck and used to form everything from rocker panels to roof contour panels. Just clamp the metal to the pipe and work the metal across the pipe with hammers to form the contour.